Friday, January 20, 2023

Heart Shape Treat Box - SVG

SVG Available on my website!


Tuesday, December 29, 2020

Design Bundles Valentines Freebies


Valentine's Day is right around the corner!  Whether you're a business or a hobbyist it's time to get started on your V-Day crafts! 

I have compiled a list of freebies just for you, from The Hungry Jpeg. 


There are tons more Valentine-related items, so make sure to take a look!

Happy crafting!!!


Monday, December 28, 2020

Amazon Christmas Ornament

 Let us be honest!!  Amazon is THE best thing since sliced bread!!  Lol And once Covid happened, it literally became the world's lifeline!  

I began to think that Santa worked for Amazon...bc day in and out packages kept appearing on my door! 

All of this inspired me to make a memorable ornament for Christmas 2020!  Check out the super sped up video! 


If you enjoyed the video and would like to see more, click the link below to find me on my social media platforms.


As always, if you have any questions, don't hesitate to ask! 

XoXo
Crafting With Meek

Wednesday, November 13, 2019

Paper & Vinyl Cake Topper

Good morning!!!!  I just want to share with you a super quick video I did on assembling a cake topper using paper and vinyl!

Often people don't think to mix the two, but it opens up a world of opportunity by doing so!  It allows you to add different looks and textures, and sometimes it can save you some time. 


Cardstock


(in-store at Joann)

Glue Pen

Pop Dots

Pick Me Up Tool


Cricut Brayer
(This is an affiliate link.  Buying through this link will help me out tremendously at no extra cost to you.  Thank you!)

Cricut Vinyl
(This is an affiliate link.  Buying through this link will help me out tremendously at no extra cost to you.  Thank you!)


Hopefully, this has inspired you to branch out and try something new.  If you have any questions please do not hesitate to contact me.


XoXo


Thursday, October 10, 2019

14" Pebbles Paper Piecing

Good morning & happy Thursday!!!  On Monday I posted a video on IG of me putting together a paper cut out of Pebbles.  I am going to share with you how it was done.


Tools Needed:

Pebbles SVG File
Cricut
Cardstock
Adhesive


So I started by sizing my file to my liking.  I wanted her to be 14".  So I am a bit anal on placement when it comes to paper crafting.  So I sometimes like to score my project first before cutting.  See the video below.


You will be able to see where each individual piece goes. This is extremely helpful when you have a million pieces to place. My lighting wasn't so great but you can kinda see where the score lines are.


Here is a quick video of me assembling Pebbles.


This is how your finished project will look.


If you are wondering which adhesives I used, here they are. 


Scotch ATG tape gun & the Zig 2way glue pen. I also used the Silhouette pick-me-up tool for my smaller pieces.  These are 3 of my top 5, most used craft supplies. Click on the links below to purchase on Amazon. However, you can also purchase these in any craft store, using a coupon!


I hope that this was helpful!  If you have any questions, feel free to contact me!

XoXo
Crafting w/ Meek


Wednesday, September 25, 2019

Stacked Pumpkins Fall Decor


Hopefully everyone is having an awesome and productive week!! I have been working on fall crafts for my house.  Fall is my absolutely favorite time of the year.  The colors are magnificent, the weather gives me all the feels, and my PSL soothes my soul!  With that said, I want to share with you guys a quick, easy, and super cheap fall home decorative piece. 

Supplies Needed

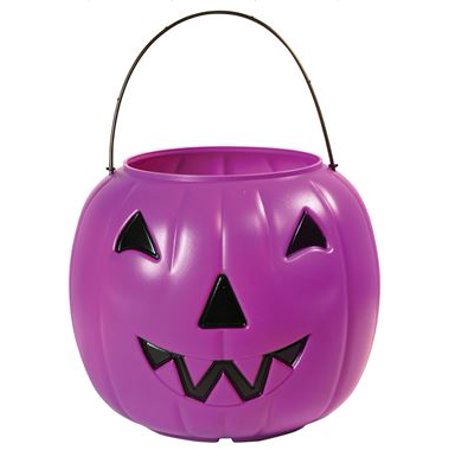
1.  Plastic Pumpkin Buckets

I purchased mine from Walmart for $.99 I think they can only be purchaed in the store but I am posting the link to the webiste below.

2.  Spray Paint
Your color preference of course.  I used a metallic gold.  Just make sure that it will bond to plastic.

3.  You will also need a sealer once you're finished painting them.  This is the one I used but of course it's totally up to you. 

4. You will aslo need an adehsive to stack the pumpkins togteher.  I used hot glue and it worked perfectly fine.  I am sure you can use E600 or any other adhesive that will bond plastic.

5.  Vinyl
I used my Cricut Maker to cut words for my pumpkins.  I used Cricut Adhesive Foil.  Which is actually on sale right now.  Click Here to buy the one I used or to check out other options.  This is an affiliate link.  Buying through the link will cost nothing extra to you, but will send a little something my way!  Thank you in advance.


6.  Lastly you will need something to put into the top of the open bucket.  I chose to use faux flowers, the I purchased from the good ole' Dollar Tree!  Remember I mentioned this was a super cheap diy!   Click Here to purchases the flowers!  I suggest just going into the store to get them, unless you need a huge bulk.


First you will start off by removing the handles from the buckets. 


Now its time to stack them and glue them together. Make sure all of the faces are facing the same direction.


Spray Paint Time


I did maybe 3 layers.  I just wanted to make sure that you could'nt see any of original pink color.  After it was completely dry I put on two layers of the semi-gloss clear sealer.  I actually let that dry overnight.  I did this to make sure the transfer tape would  not cause the paint to peel when it was time to apply the vinyl decal.

I cut decals in Design Space, with the Crircut Maker.


Next I applied the decals to the pumpkins, added the flowers, and some cute fall theme ribbon.


Here is the finished product. 


Disclaimer:  I am not a floral designer.  I am a paper crafter so don't judge me! Lol 

I hope this has helped you as much as possible!  If you have any qustions, please do not hesistate to reach out.

You can find/contact me on: 


XoXo
Crafting w/ Meek


Monday, July 22, 2019

Personalized Emory Boards/Nail Files

Happy Monday friends!!!!😊

Who doesn't like a cute little personalized gift???  I have a super cute idea for a gift, party favor, or marketing tool!

Personalized nail files!!!


My daughter will be turning 13 soon!  Her theme is royalty!  So we are using the tagline, Queen of 13!  She will also have a court...or what we are calling it, her royal squad.  She will be sending out gift boxes asking her close friends to be part of her royal squad. These will be included along with

  • Purple Nail Polish
  • Water Bottle
  • Lip Gloss
  • Ring Pop
  • Makeup Pouch
  • Heat Resistant Tape


Back to making them.  Lol

You will need the following:

  • Sublimation Tools (Ink & Printer)
  • Blank Nail Files (these are the ones I used Amazon - Nail File)
  • Regular Copy/Printer Paper
  • Heat Press
  • Designing Software ( I used Silhouette Studio)


First I measured the nail file....lets just say I absolutely hate measuring!!  Like, despise it!  However, I got my measurements together that were somewhat equal to the actual file size.  The template is a tad bit longer and wider than the file, just to ensure it's fully covered once you sublimate your design.  

I have made my template available to download.  The template comes as a:
Choose/make the design of your liking.  Do not make the design as large as your template, or it will not fit on your file.


Once you are finished designing, you must mirror your image!


I print directly from Silhouette Studio.  I set it on the "Best Photo" print option.

I used my heat press, to press these.  
  • 400 Degrees
  • 60 Seconds
You can actually press more than one at a time.  Use the heat resistant tape to hold the file in place.


Cover and press.  Press, print side up!  And voila!!!  

Personalized nail files!


If you have any questions, please do not hesitate to ask!


XoXo

Crafting W/ Meek


Find me on:


Saturday, June 22, 2019

Teacher Appreciation Buckets

So for teacher appreciation this year I decided on doing a movie night bucket for my girl's teachers!  They were super simple and easy to put together!  This is what they looked like:


The bucket contents were:

Popcorn, Nachos & Cheese, Soda, Mike & Ike, M&Ms, Snickers, Reeses, Redbox Rental Code, & a comfy shirt to lounge in! 

I purchased the popcorn bucket from Dollar Tree.  They normally have them year-round in store.  But if they don't,  you can always order online. 

Redbox rental codes were purchased online at Rebox.com.  I bought 5 codes for about $8.  I had 4 buckets to make so this worked out perfectly.

I made the ticket using my Cricut Maker.  The ticket was an image already in Design Space.  I added the text and used the print then cut feature.

Shirts were designed and made by me, Crafting with Meek.  I thought this would add the perfect touch to the baskets.  It was just a little something the teachers could lounge in while having their movie night in. 

Oh last but not least... I purchased all of the goodies from Walmart.  I actually used the grocery pickup!  When you need to multi-task... it's definitley a time saver!


If you are interested in the "redbox and grade" cut file, it is available in my Etsy shop.  I also have some other variations!  


Thank you for dropping by!  

XoXo
Crafting w/ Meek